Photoshop photo retouching 1
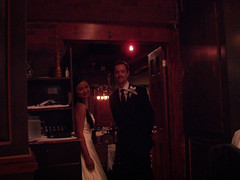
I passed by Rui’s computer at work one day and saw this picture I took of their wedding as the background. She told me that this is her favorite picture out of all of the wedding photos. I remember this one clearly. I remember how sad I was at missing the opportunity to capture this moment correctly with a good camera. I remember trying to hold my hand very still, hoping that the image will not blur because of the slow sensor. Lighting was bad (at least for the crappy $150 camera I had), which explains the original grainy image you see above. Notice the reddish color? Well, that is due to the dying blue sensors of this camera.
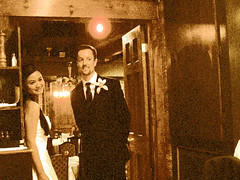
I was quite disappointed when I opened up the picture in Photoshop. It looked beyond repair. There were color information in only 1/8 th of the color levels and most of them in red. The blue channel was completely messed up. So I decided to give it an old and damaged look. Sepia filter is best suited for that. So I isolated the super grainy blue channel and used it as a sepia overlay on top of the original image. The result is this with huge fiml grain effects. This was done approximately 2 years ago.
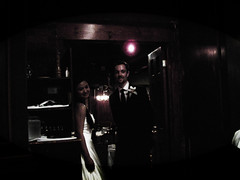
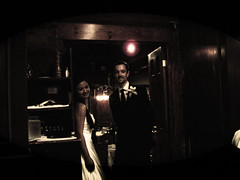
Fast forward to the present. I have since learned numerous repair techniques in photoshop and also worked extensively with image processing hardware that uses algorithms to compensate for sensor defects. Image processing seems to have become my field of specialization. I actually have to add more grain to the repaired image to keep the wild wild west look. In addition, I added some EPIC effect to all white colors in the picture (wedding dress!!!). Done through gaussian blur, difference filter and vivid light.
And finally, a touch of sepia filter. Just enough to give it that old aged look.


Leave a Reply to Causalien Cancel reply